Color Adjustments
1.Brightness and contrast


2.Levels (Ctrl+L)
3.Curves (Ctrl+M)
4.Exposure
5.Vibrance
6.Hue/Saturation (Ctrl+U)
7.Color Balance (Ctrl+B)
8.Black and white (Alt+shift+Ctrl+B)
9.Invert (Ctrl+I)
10.Posterize
11.Threshold
12.Gradient map
13.Desaturate (shift+Ctrl+U)
These are the adjustments options mostly used.This option working on your photos.

1.Create new document
2.Import the image
3.Duplicate the layer then adjust the colors.this duplicate layer is used to compare the original images.
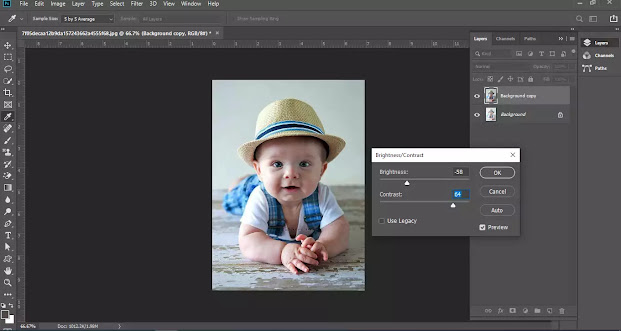
1.Brightness and contrast :
This option used to increase the brightness and contrast based on the your image.

2.Levels (Ctrl+L) :

3.Curves (Ctrl+M) :

4.Exposure :

5.Vibrance :

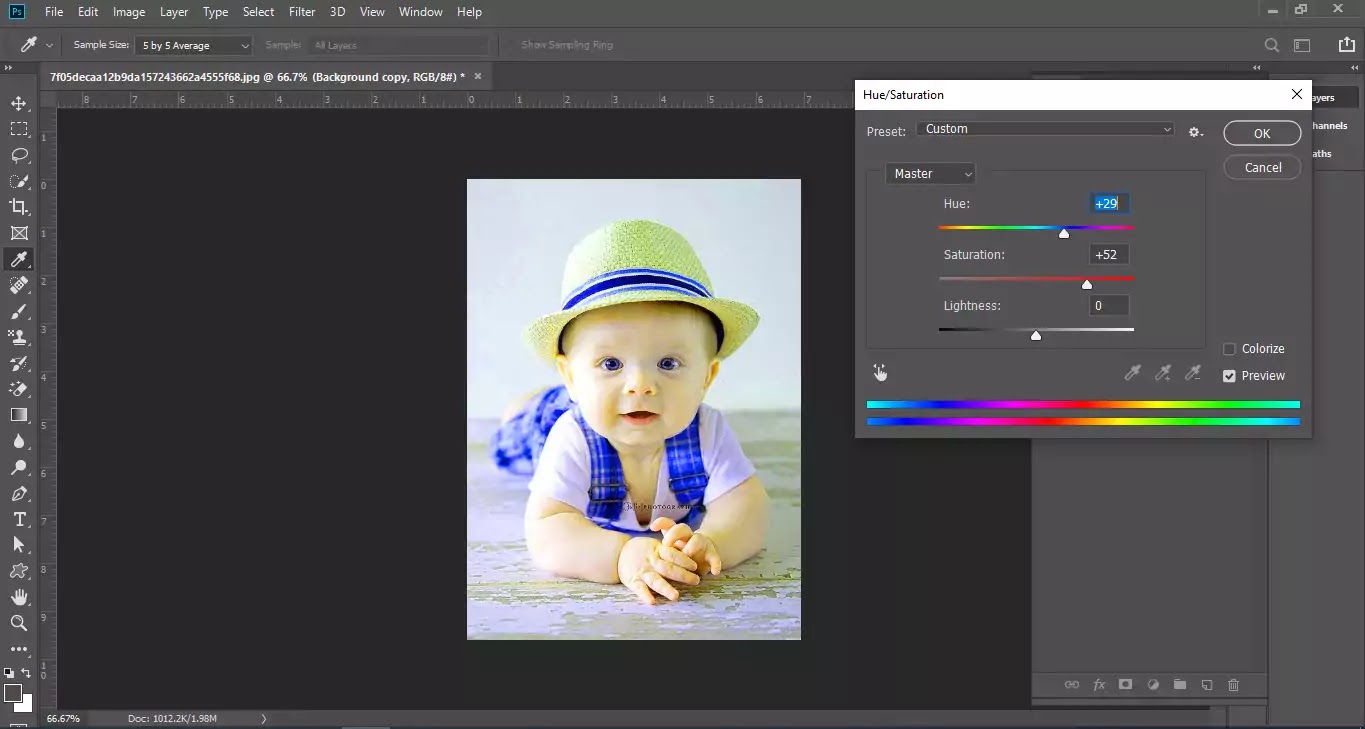
6.Hue/Saturation (Ctrl+U) :
This option is used to change colors using the Hue and saturation.
7.Color Balance (Ctrl+B) :
It's used to adjust the color on the images to balanced.Over brighten areas are corrected using this option.

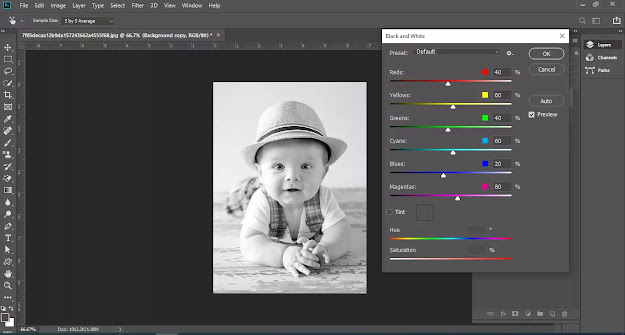
8.Black and White (Alt+Shift+Ctrl+B) :
In this option to create the black and white images.
Examples in below,

9.Invert (Ctrl+I) :
Invert option is used opposite to original image.

10.Posterize :
To adjust the values then create the posterize image. Mostly,the values are between the 4 to 6 to clearly full fill the image.

11.Threshold :
Create your own image to logo's then use this option.

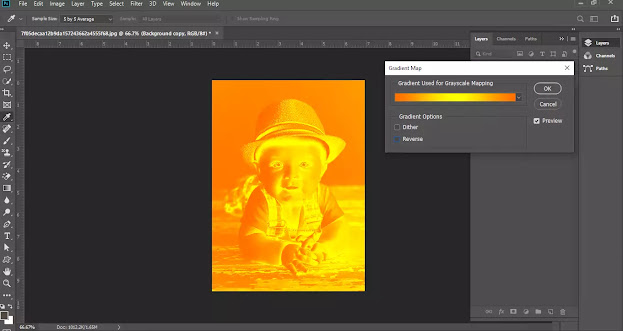
12.Gradient map :
Use gradient option to create the multi color images.
Example

13.Desaturate (Shift+Ctrl+U) :
Desaturate is black image and saturate is original image.

YouTube Channel Link : http://raboninco.com/23Uku
Subscribe link: http://raboninco.com/20Uzf
Amazon : OPPO F17 pro
This is an photoshop Tutorials and tips and tricks of graphic design softwares.
ConversionConversion EmoticonEmoticon